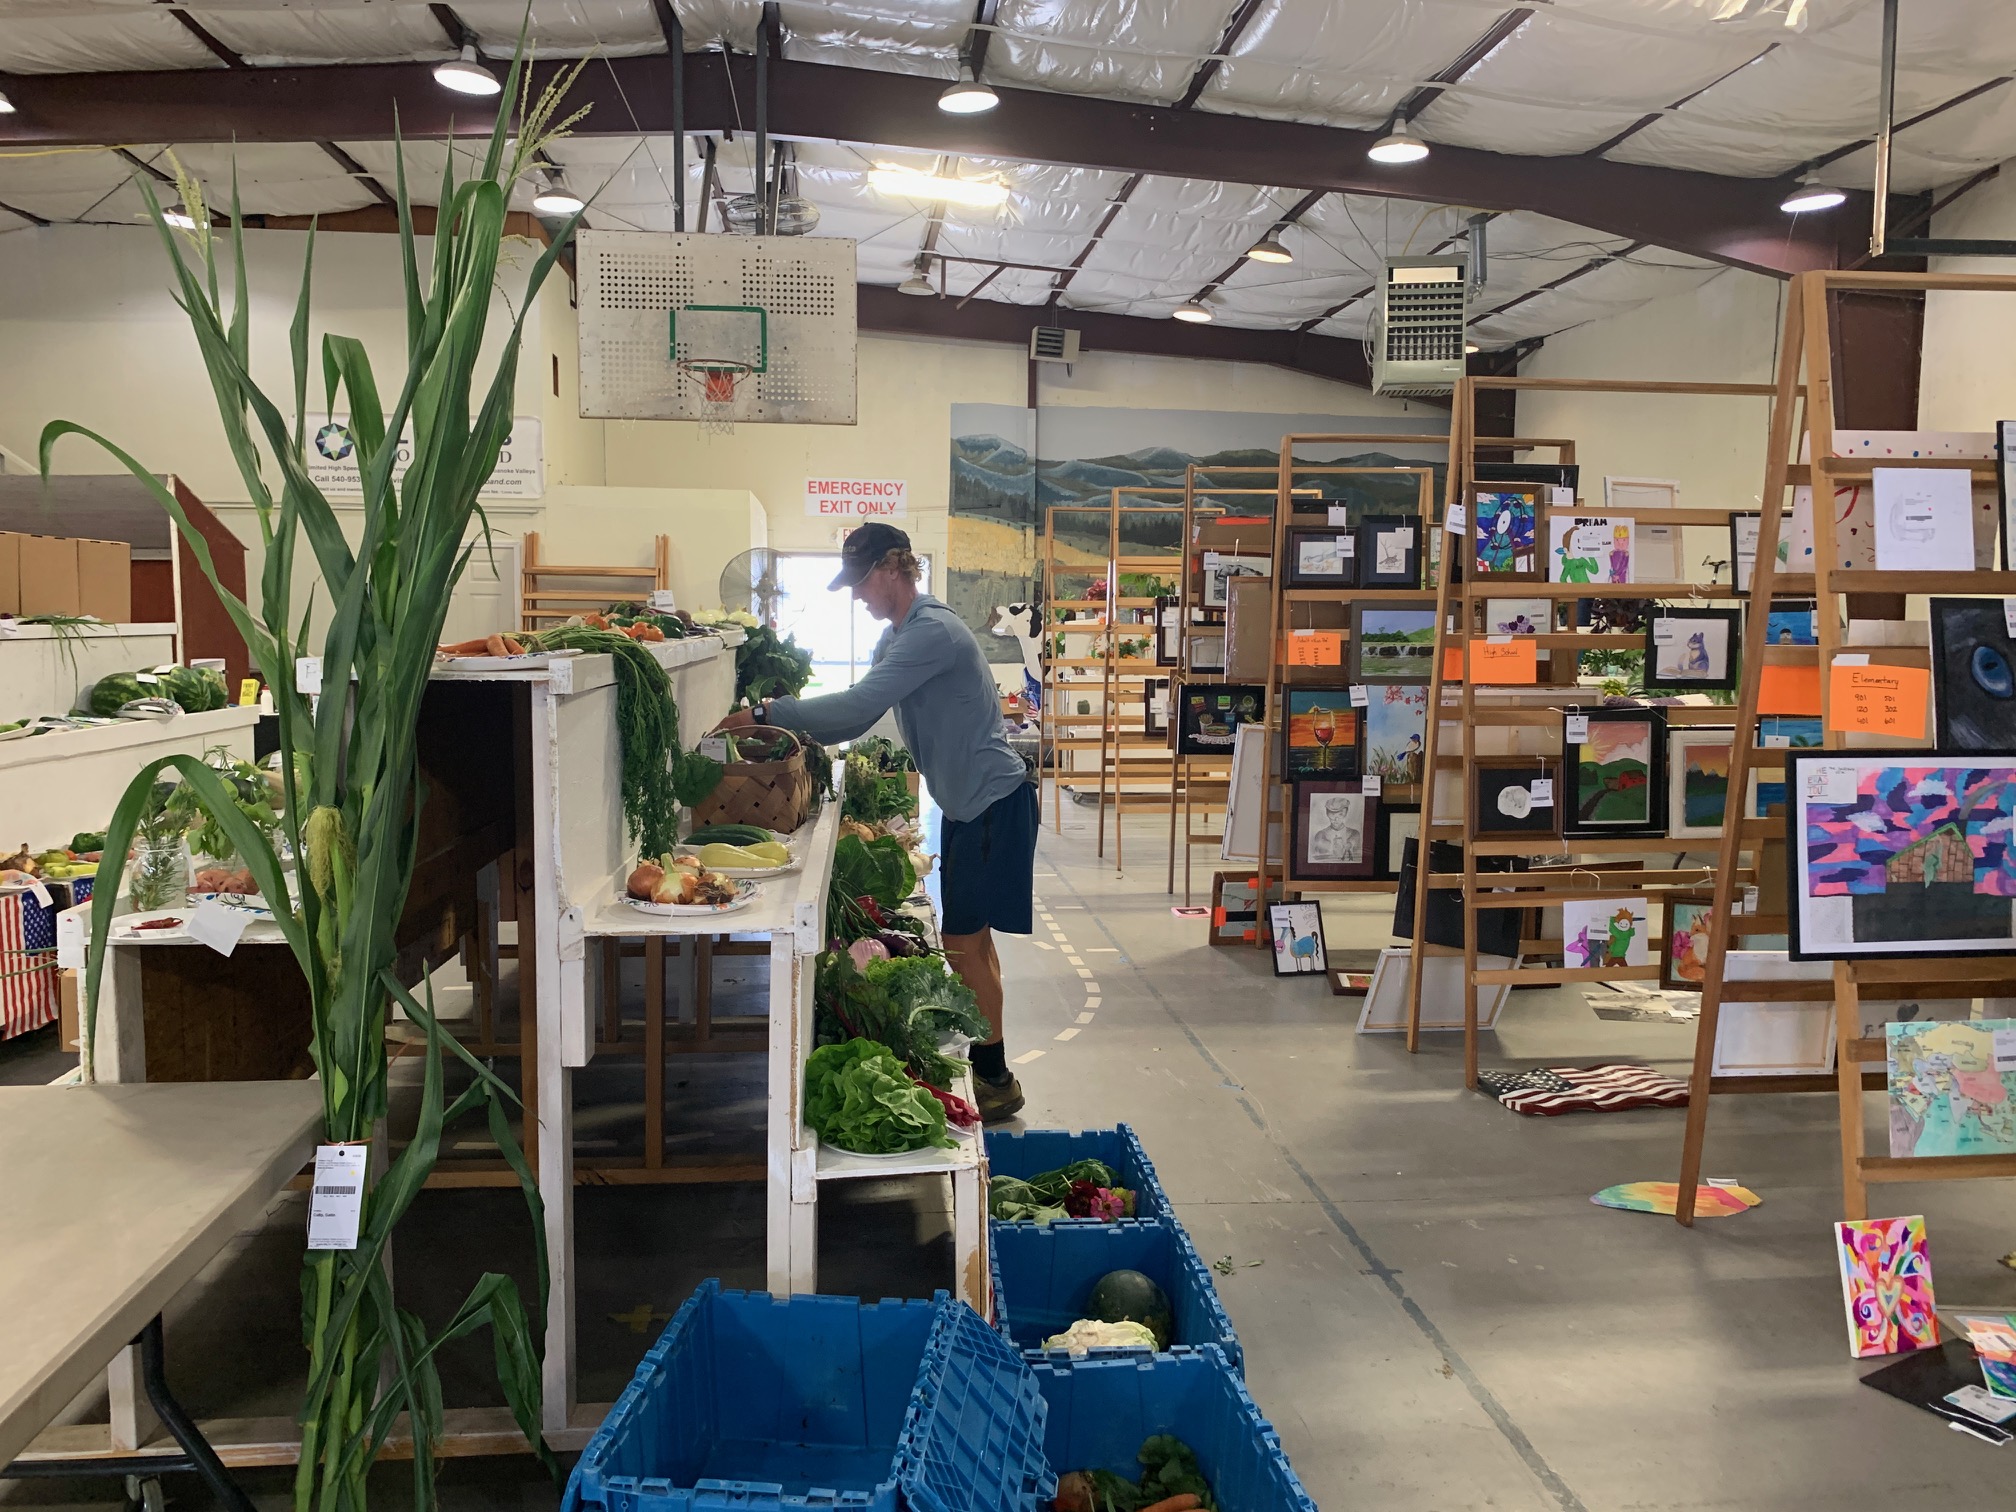
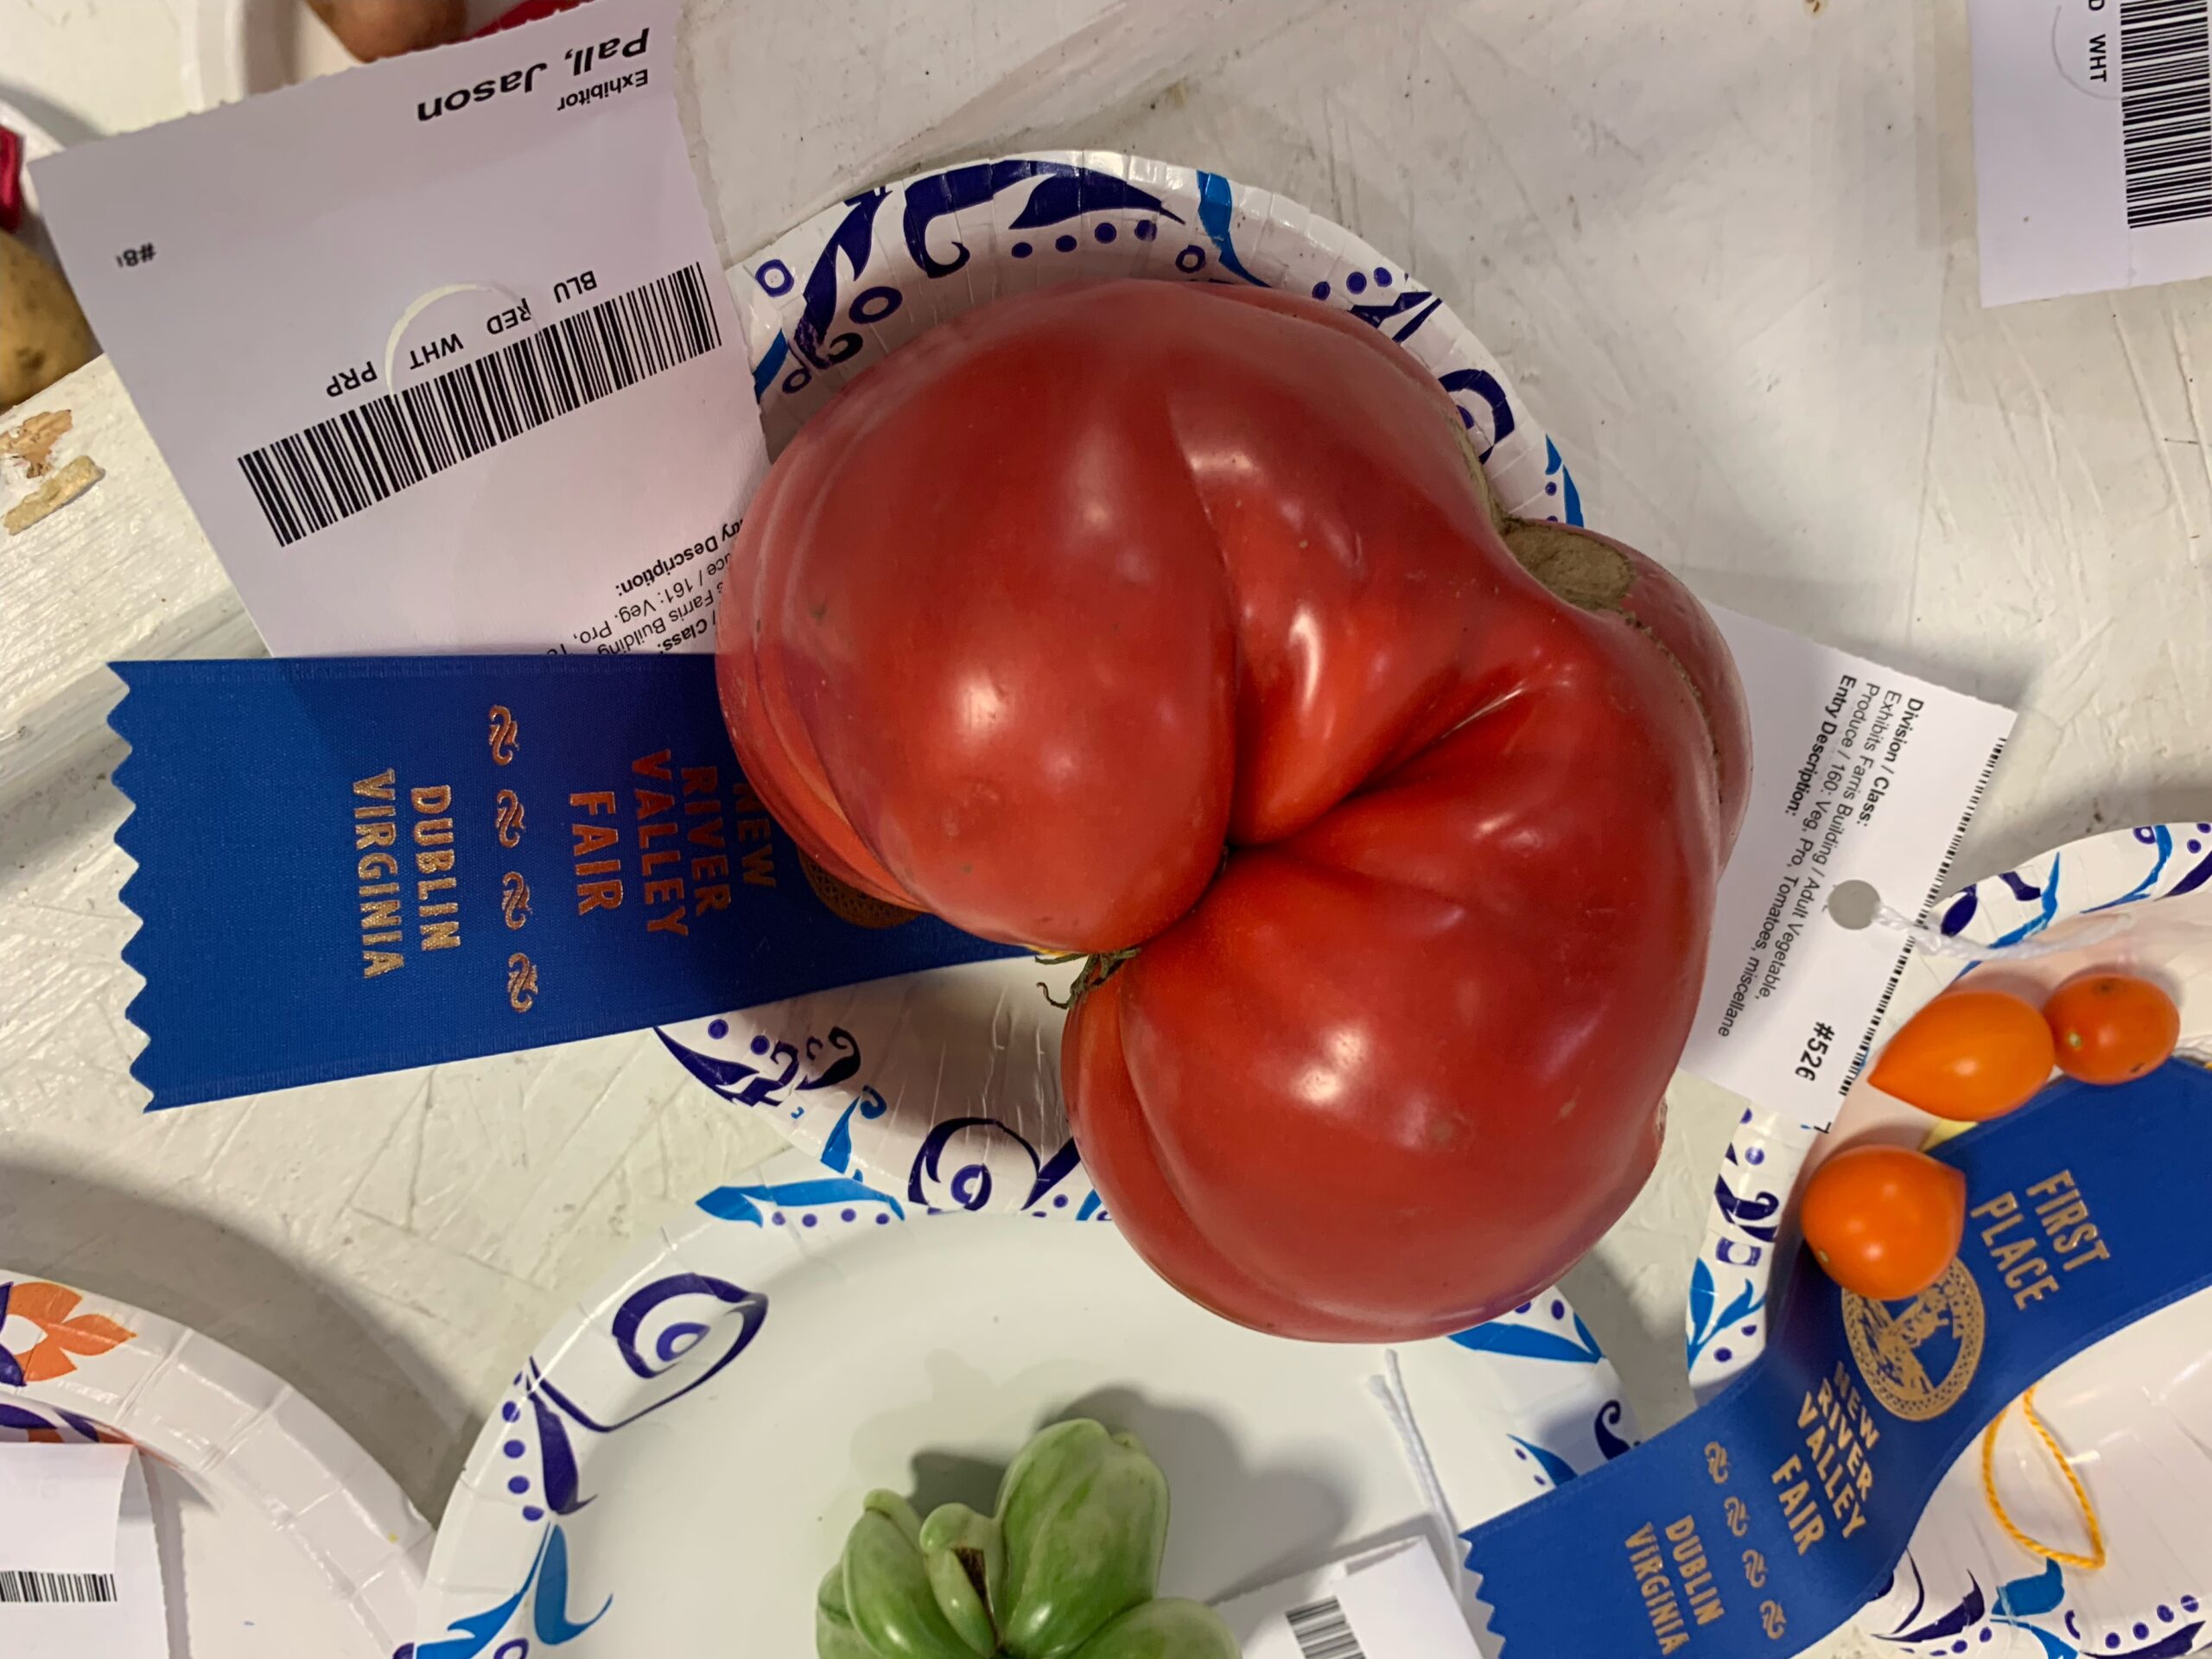
Posted on

How to get kids to eat more veggies

(Expert tip- never bring the veggies inside)

Kids are way more likely to eat veggies by pulling from their own garden plants than from a plate at mealtime. Here we provide tips for starting a kid-friendly vegetable garden or porch containers so that they graze on more fresh food and less junk. We’ll also offer our favorite combos to get kids to eat more veggies, on the go and at the table.

I’m just guessing here, but…if you have kids you very likely have these priorities for them in mind:

  1. That they feel loved and are happy.
  2. That they eat nutritious food to help them grow up healthy and strong.
  3. That they’re getting outdoors a lot and are not glued to a device indoors.

These goals are easy to say and harder to stick with. The hustle and bustle runaround of school, work, activities are enough to leave the whole family exhausted.

So how can we get our kids to actually seek out fresh veggies when they’re craving a snack?

We’ve found the best way is to not even try to serve veggies on a plate. Trust me here- we are professional vegetable growers and our kids rarely eat veggies from a plate sitting down at meal time.

They DO however eat them directly from the garden during a stroll, as they’re passing by a container cherry tomato plant on the porch, or even when they’re walking through the farm stand and see an open bin of carrots inviting them to take one.

So what are some easy (talking real easy) veggies to grow in any ground space that they’ll go for?


Here are some basic tips for growing easily munchable veggies.

  • Put your garden or containers as close to the house as possible. Right outside your doorstep or place you pass multiple times daily is best, even if the space is small.
  • Constructed raised beds are pretty but definitely not required.
  • Veggies don’t have to be in their own plot. Small planting spaces are just fine. You’re not trying to homestead here so if the spot near your door is big enough for one head of lettuce only then just do that. You can mix veggie plants here and there too with perennial landscaping (make sure its unsprayed).
  • Make the soil the best you can to get started by purchasing or adding compost to planting holes. Look for “Raised bed potting mix” to fill containers rather than bags marked “top soil”. Make sure your base contains some compost. Buy the best mix you can to get plants off to best start possible. Your plants may start and stay weak unless you nurture their soil nutrition and add compost at the start.
  • Purchase seedlings from actual growers like at the Farmers Market or Crows Nest. Avoid big-box store seedlings because those plants are grown to look nice and not necessarily be healthy (they’re typically pumped up with fertilizer and will be stunted and not hardy or accustomed to real life garden conditions).
  • Add a small amount of a balanced organic fertilizer, like 5-4-3. Read package instructions for application. If you add too much fertilizer your plants will be leafy with few fruits and may attract aphids if they have too much nitrogen.
  • Plants need space to thrive. Don’t overcrowd them in containers or gardens. Minimum container size: for herbs, 1 gallon; for other plants, 5 -10 gallons.
  • Mulches and landscape fabrics can really help keep weeds at bay, keep moisture in your soil and help warm it. Insect-net and row covers can help protect vulnerable crops without needing pesticides.
  • Certain crops only do well in certain seasons. For example, you’ll have best success with lettuce, spinach, radishes, broccoli and salad turnips during spring and fall only. Veggies best in the summer include tomatoes, peppers, cucumbers and melons.

Select veggies that can be eaten raw, straight out of little hands. For example, go for cucumbers over summer squash.

Here’re our favorite right-from-the-garden veggies:

Garden VeggieKid garden growing tips
Cherry tomatoesFor containers, get bush-type plants (Sungold)
Romaine or any LettuceDirect seed or transplant. Plant often (every 1-2 weeks)
HerbsEasy and seedlings are readily available. Try dill, basil, parsley, bronze fennel.
CarrotsCan be grown all year. Keep seeds moist to germinate. Do shallow seedings in deep loose soil.
SpinachCool season only. Direct seed Sept-mid April.
MicrogreensCan be grown indoors in a windowsill. Start with a good potting soil or even just peat. Best seeds for microgreens are broccoli. Ready 10-14 days from seed to harvest. Harvest with scissors. Refresh tray and start again.
Green onionsCan plant directly from purchased green onions. Harvest tops and leave bulb to keep growing. Treat as a cut & come again crop
Salad turnips (hakurai)Spring/Fall (cool season crop Quick growing and germinate easily but insects love them so cover with row cover or insect net as soon as you seed them.
Sugar snap peasGet in early (early April). Watch out for rabbits (net or row cover). Trellis makes them easier to pick.
Ground cherries/Husk cherriesTreat like cherry tomatoes for container planting.
CucumbersOnly grown when soil’s warm. Wait until late May to plant seeds or seedlings. Prune off first set of flowers to get stronger plants at onset. Cover with row cover to protect from cucumber beetles.
Sweet lunchbox peppersPlant when ground is warm (late May) and no sooner. Focus on growing a healthy plant (not fruits) so prune off first initial clusters of flowers. Sweet, colorful (red, orange, yellow) peppers come with ripening. Leave green ones on plant to ripen. Don’t eat raw green peppers.
StrawberriesBuy plants ready to go.
MelonsSelect small varieties that can be eaten in one sitting and have shorter maturity times (less time for something to go wrong). Use landscape fabric to warm the ground and keep weeds down. Plant in full sun. Make sure you fertilize the soil. Be patient because they take a long time to grow

Ok, so you don’t have time to garden much but want your littles (and you) to eat more veggies. These are vegetables that are easy to incorporate in meal time without much fuss or even cooking in most cases. Put small (maybe super small) portions out to start if you have a hesitant eater. Consider even tiny tastings by kids a success.

Meal time veggiePlating tips
Cherry tomatoesNeed no explanation
Carrots, CelerySlice into sticks
Kohlrabi, Salad turnipsPeel and slice. Serve with dip like hummus, black bean dip or ranch
SpinachBlend (sneak) into pizza sauce/dips/pesto
MicrogreensSprinkle on everything- sandwiches, soup, tacos, nachos, bagels, pizza…
Leafy lettuceJust serve 1 leaf. Make it like finger food that they can simply pick up with their fingers to eat

The last trick I’ll share is the captive audience veggie snack kit. By this I mean that I pack veggies with me for snacks on the go. My go-to mobile veggie snack is carrots because they’re sweet, sturdy and pack well.

If you’re travelling in the car or take a break on a bike ride or at the park and they ask for a snack from you, you hand them a carrot, they see clearly that there are no other options, then they eat it without fuss. And they find they like it. If you brought other snacks too either don’t let them know this at first or offer it after they’ve tried the veggie.


Certain vegetables are not good for raw eating and should be cooked first. The vegetables listed below are much more digestible cooked or contain low levels of toxins that are neutralized by heat during cooking.

Vegetables we avoid raw include:

  • Green beans (or any raw legumes)
  • Edamame (edible soybeans)
  • Green peppers (or any green/unripe night shade like green peppers, tomatoes)
  • Potatoes
  • Beets

Remember, even if you kids are just eating a monochrome tan plate of chicken nuggets every night when you sit down to eat, you can be happy knowing they snacked on veggies during the day in motion before you even sat down.

If all else fails, kids can always grab a veggie snack at our farm stand. Look for our kids’ bin of free veggies next time you’re by!

Posted on

Fresh eggs as new beginnings

What symbolizes new beginnings more than the perfect, fresh egg? And why shouldn’t it? All birds have their highest lay rates in spring as daylight lengthens at an accelerating rate. Eggs contain all the essential nutrients and minerals for life (of a baby bird, that is). Ah, marvelous eggs.

Spring is also the only time of year we do our live duck egg hunt– It’s exactly what it sounds like. We go out with families and look for the real fresh eggs our flock has laid. What fun!

We’ve been raising laying ducks for over 10 years. ~ Photo by Silver Pebble Photography.


Here’s an interesting tidbit about how receptive ducks are to increasing light. Their skulls and skin are thin so that some sunlight even reaches directly to the hypothalamus (light receptive) area of their brain, stimulating them to lay eggs. Hence, even blind ducks will increase their lay rates with the rest of the flock, starting shortly after the winter solstice.

Our flock of laying ducks and laying hens are certainly in high gear now. We’re grateful for them and the beautiful eggs they lay.

Eggs are wonders in themselves. They cook so quickly and in so many versatile ways. Fried, scrambled, in savory quiches or in sweet dessert creme patissiere. They’re high in protein, B vitamins and iron. Mixed with fresh greens, they practically make a complete nutrition-packed meal in no time. What’s not to love?

Our farm stand is fully stocked with fresh duck, chicken and even goose eggs now.  Their yolks are extra golden from all their foraging and the supplemental organic whole-grain feed we provide them. You can pick them up any time from our farm stand using our convenient self-serve kiosk or visit us during our full-service hours

Need year-round fresh egg security? Join our Egg Farm Share.

Here are some of my favorite easy, egg recipes. See more recipes on our duck egg recipe page.


Spanish Omelet-Style Egg Cups
adapted from Lisa Stelle’s Toasty Baked Egg Cups recipe

Ingredients

  • 2 lbs root veggie blend, potatoes, carrots, onions, and/or rutabagas, cut into 1/2 inch cubes 
  • 3 tablespoons butter or lard, melted, or mayonnaise
  • 12 oz sliced sweet red peppers
  • 3/4 cup shredded Gouda cheese or cooked, crumbled sausage
  • 12 eggs
  • Kosher salt
  • Freshly ground black pepper
  • Chopped cilantro, for garnish

Instructions
Preheat the oven to 375 degrees.

In a skillet, fry root vegetables with butter/lard over medium heat until browning and tender. Set aside.

In same skillet, add another tablespoon of butter/lard and fry peppers over medium-high heat until fragrant and just starting to char. 

Spoon 1-2 tablespoons of the browned root veggies into each cup of a 12-muffin tin. Carefully break and slide 1 egg into each cup. Top with a forkful of cooked sweet pepper and cheese (or sausage). Season with salt and pepper.

 Bake the egg cups about 17 minutes until the whites are set, the yolks are cooked to your liking.

Remove the pan from the oven and run the tip of a butter knife around the edge of each cup to loosen it from the pan.

 Let the egg cups cool for a few minutes, then carefully remove them from the pan (2 forks make this easier). Garnish with chopped cilantro and serve with fresh green salad.


Golden Wing Creme Patisserie (duck egg pastry cream)

Ingredients

  • 2 cups milk
  • 4 duck egg yolks
  • 6 tbsp sugar
  • Pinch of salt
  • 3 tbsp cornstarch
  • 1 tbsp vanilla extract
  • 3 tbsp unsalted softened butter

Instructions

Add vanilla extract with milk in saucepan. Heat the milk over medium high heat to a slight simmer.
While heating the milk, place the sugar, egg yolks, cornstarch, and salt in a bowl. Whisk until you have a thick, smooth mix.

As soon as the milk starts to steam or simmer, remove it from the heat. Slowly pour about a half of the hot milk in a thin stream into the egg mix, WHILE WHISKING CONSTANTLY to temper the egg mix. When the eggs have been tempered, add the egg mix back into the hot milk in the saucepan.
Heat the custard base, over medium heat, while whisking vigorously until it starts to thicken, about 1 – 2 minutes. Bring to a simmer.

Lower the heat and cook for a further 1 – 2 minutes after you see the first bubbles break the surface, and make sure to whisk constantly.

Remove from the heat and add the butter. Whisk in the butter, until it’s completely mixed in.
Pour the custard into a bowl. Let the custard cool down to room temperature and eat as-is or then let it chill in the fridge for a few hours.

Posted on

Kitchen Equipment Library for Farm Share Members

We’re excited to launch our new kitchen equipment library for farm share members! You can peruse the library here.

We know it- cooking with real ingredients takes extra precious time! We feel that too. How can we all eat healthier if we’re getting frustrated or feel uninspired in the kitchen? That’s my main motivation for starting the kitchen equipment library. I want to share some of the tools I’ve found especially helpful in preparing food right from the farm or tools that make big special projects easier and more fun.

Photo of my kitchen by Silver Pebble Photography

In my home kitchen these are two my most used pieces:

  • Slow cooker– I pull out my slow cooker several times a week to make broth, cook beans, make a pork shoulder roast for pulled pork, render lard (see our previous post) and more. I love that it takes a long time without burning so I can set it up overnight or during the work day and come home to a one-pot meal ready to eat. I know a lot people use Instapot. We’re working on getting one of these for the kitchen equipment library too.
  • Immersion (stick) blender- I gave up on countertop blenders long ago and traded for a stick blender. It’s so mobile I can blend a soup right in the pot without a hot messy transfer to blend or run it through the food processor. It’s also great for smaller narrow containers for smoothies. My stick blender gets the most use during tomato season. I make whole-tomato sauce meaning it contains skins and seeds and all but the very tomato core. To make it work I depend on my stick blender to blend it all up in my stock pot after I’ve cooked the tomatoes down.

Also at the farm stand available to anyone is our ever-expanding cookbook library. We’ve acquired many cookbooks through our own collection and gifts from customers. We love cookbooks of all sorts but especially those that are seasonal and simple, and emphasize using whole foods. But we also love some of the more complex recipes in other cookbooks for special meal events. Some of my favorites there are:

  • Six Seasons: A New Way With Vegetables by Joshua McFadden
  • From Asparagus to Zucchini: A Guide to Farm-Fresh Seasonal Produce by the Madison Area Community Supported Agriculture Coalition
  • The Grassfed Gourmet Cookbook: Healthy Cooking and Good Living with Pasture-Raised Foods by Shannon Hayes

Come by the farm stand and ask us what more we love to use. What are your favorite ways to use your kitchen and what would help you use it more?

Posted on

Why Local Lard is Lovely

I want to share with you a great, but little-known joy in my life. Hear me out: lard is lovely! 

I have respect for pork-free lifestyles and plant-based happiness but for those of us that do partake in pig, allow me to educate and hope to entertain the idea of using more lard in your life too.

We raise pastured pigs here at Glade Road Growing. They live outdoors and are rotated around the farm to root and soak up sunshine throughout their lives here. At harvest, we have a variety of pork cuts (sausages, roasts, chops, bacon, etc) and also a large amount of pork fat, upwards of 12% of the total weight we get back from our butchers. In our strive to utilize all that comes back, we have discovered some pretty versatile uses for the pork fat, which otherwise would essentially be a waste product.

Lard is simply the fat rendered down from pigs. I’m not talking just any pigs and I’m not talking grocery store lard.

I’m talking happy, healthy hogs raised locally, living outside, soaking up lots of sunshine. A lot like the pigs we raise here.

I’m talking about lard made in small batches, is minimally processed with no added ingredients and is not artificially hydrogenated.

Lard was once revered, then suddenly and unfairly got a bad health wrap. But that is starting to change. Besides its nutritional and cooking qualities, it’s an oil that we can produce locally as opposed to olive oil, coconut oil, and palm oil which are typically imported from overseas. Oils and fats for foods and soaps are essential and have to come from somewhere! Why not from here? 

We sell rendered lard to use as a cooking oil and for years our friend Elisabeth Swindell of Antonina’s Garden has been making handmade soaps with lard from here as the main ingredient. 


As a soap base, lard has many benefits.

Lard soaps are especially mild and moisturizing because the cellular make up of lard is very similar to our own skin. The soaps produce a light lather that doesn’t strip your skin’s natural oils like many other soaps on the market.  Lard soap bars are especially long-lasting and do not turn to mush in your soap dish. Animal fats in soaps is not a new concept. Most commercial bar soap (Dial, Ivory, Dove, Jergens) are all made with tallow. Fancy designer soaps usually use coconut oil, palm oil, or olive oil.

Lard soaps clean well yet are mild enough for my face and my kids. Our soaps are scented with an assortment of essential oils (options include lavender, tea tree, patchouli, atlas cedar, spearmint, tangerine, rosemary, and unscented) and available in bulk without needless packaging. They’re available for sale at our farm stand during full service hours.


As a cooking oil, lard continues to be a rock star!

Lard, especially that raised from outdoor pigs, is high in vitamin D. It is has higher mono-unsaturated fat (ie “good fat”) than butter, coconut oil, and soybean oil. Lard has a high smoke point and so is especially good for frying. For pastries and pies, the lard crystal melts in a way that leaves air pockets for that revered flakiness.
 
The internet thinks so too! Here are some articles on the benefits of lard:
Huff Post, In praise of lard and how to render your own
Iron Chef Alton Brown, The virtues of pork fat
Supermarket Guru Phil Lempert, 5 reasons to choose lard as you cooking oil
Prevention, Should you be eating lard?  [yes!]
Dr. Andrew Weil, Is lard healthy? [yes!]

I use lard for almost all my frying and am experimenting more and more in baking. I usually take a recipe and substitute the  listed amount of butter with lard and get tasty results. My good friend eats both dairy-free and gluten-free and I have found that using lard in these such recipes works just fine. To prove it, here is a lard chocolate cake recipe, easily converted from a vegan recipe passed down by my grandmother. The recipe is dairy-free and egg-free and works well with either regular or 1:1 gluten-free flour:


Wowie Chocolate Cake using luscious local lard
 
Ingredients:
1.5 cups flour (or 1:1 gluten-free flour)
1 cup sugar (or honey)
1 tsp baking soda
3 TBS cocoa or cacao powder
1 TBS vanilla extract
1 TBS vinegar
1 cup warm water
5-6 TBS melted lard (less for a fluffier cake, more for a fudgier cake)

1. Preheat oven to 350 deg F.
2. Mix dry ingredients.
3. Make a well and add wet ingredients.
4. Mix well. If batter is too thick, add more water 1 TBS at a time.
[Optional: top cake with shredded coconut or chopped nuts before baking]
5. Pour into 8″ or 9″ cake pan.
6. Bake 25-30 minutes.
[Optional: Dust top with more cocoa]


I don’t usually throw around the “S” word [sustainable], but I am thrilled to be using more of the whole of the animals that we raise. Maybe you and your family will be willing to give our lard a try too. 


How we render lard:
While the fatback is semi-frozen, grate or cube it into smaller pieces, as small as you can.

Put in a slow cooler on the “Keep warm” setting with the lid slightly cracked to let the water evaporate off.

Check every 30 minutes or so to stir and keep cracklings from sticking to the bottom.

As soon as the fat has melted (this should only take about 2-4 hours), carefully ladle it off and pour through a cheese cloth into a mason jar.

You can continue to cook the cracklings down, salt them and add them to salads or just have them as a snack

Posted on

Unique Spring Veggies

This is our first blog post. Hooray!

There are so many delicious veggies that grow in spring that you rarely see on grocery store shelves. Here are some we grow here at Glade Road Growing that may be new to you and some simple preparations to try them.

Raab

We know spring is underway when the pretty golden and green florets of raab start to form. Raab is another word for the flower shoots that start to show on kale and tat soi that has survived the winter. The flower buds themselves are slightly sweet and the stems holding them have a little extra snap, with flavor reminiscent of broccoli.

Preparation: The simplest and most popular way to prepare raab is to sauté in olive oil with salt, pepper, and garlic to taste. Small slices of fruit like apples tossed in at the end help balance out the peppery flavor of the raab.

Pea Shoots

We grow a winter pea cover crop and pea shoots in the greenhouse of a variety called Austrian winter peas. They form curly tendrils with broad, tear-drop shaped leaves. Pea shoots have somewhat of a nutty flavor and a texture different from all our other greens.

Preparation: I like to top salads and wraps with pea shoots (chop them into 1/2 pieces if you have long tendrils). I also love them in stir-fry. They hold up well to the heat and it brings out more of their flavor, too. Try tossing with some sesame oil and soy sauce /liquid aminos and adding them in towards the end if stir-frying with other veggies.

Kohlrabi

Its name means “cabbage turnip” and it looks like an alien head! It has a double skin and so is one of the few vegetables I peel. Its texture is apple-crisp with flavor semi-sweet and a little like broccoli but not quite as strong.

Preparation: Raw! I peel and slice kohlrabi and love it raw on a veggie plate. Its sturdy form holds up well as a scoop for dips like hummus or ranch. Cut into sticks, it adds great crunch and flavor to salads.

Hakurei salad turnips

If you like radishes on your salad, you’ll love salad turnips. These all-white turnips are very different from their winter storage counterparts. They have a thin skin and softer texture than salad radishes and are super sweet. The fresher the better. And their tender turnip greens are a mild-flavored nutritious cooking green as well.

Preparation: Raw again is my preference here. Their bright white color adds appealing visual contrast in salads. They are also great quick-pickled with rice-wine vinegar and some grated ginger, or simply drizzled with sesame oil. They do roast well, too, and all those sugars caramelize and brown up for an additional sweet veggie treat.

Fennel

Fennel is related to dill and carrots but tastes totally different. It has a sweet flavor, like licorice, that reminds me of Italian seasoning (which contains fennel seeds). Fennel has a texture and growth habit like celery.

Preparation: I love roasted fennel. I add it to other things I’m roasting like potatoes and chicken to impart its subtle flavors. Shaved thin, it’s also great raw on a salad.

Garlic scapes

Garlic scapes appear mid-spring and are the flower shoot of hard neck garlic. It has a noodly shape and garlic flavor that is not quite as strong as garlic itself. They’re only here for a short window so be sure to enjoy them when they’re in season.

Preparation: Make garlic scape pesto by processing scapes in a food processor with lemon, olive oil and parmesan cheese. Spread the pesto on buttery toast or over pasta. Another favorite way to have scapes is to cut them into 1″ lengths and then steam them. They will come out with a texture similar to green beans but with a light garlic flavor.

Sorrel

Sorrel is a spring green related to spinach. It has a lemony flavor and is great blended with broth and cream with spinach for a classic sorrel soup.

Recipes

BEET PATTIES

INGREDIENTS:

  • 1/2 cup rolled oats
  • 1 (15-ounce) can chickpeas or black beans, drained and rinsed
  • 1/4 cup fresh dill
  • 3 tablespoons distilled white vinegar
  • 1 small onion, roughly chopped
  • 3 garlic cloves
  • 2 medium raw beets, peeled and roughly chopped (about 2 cups)
  • 1 teaspoon salt
  • 1 tablespoon oil + more for cooking patties
  • 1/3 cup chickpea flour or other gluten free flour
  • tzatziki for serving

DIRECTIONS:

In the bowl of a food processor, combine the rolled oats, drained and rinsed chickpeas, and fresh dill. Pulse for 5 seconds. Add the white vinegar then continue to blend until the mixture appears finely chopped and sticks together when you press it between your fingers. Scoop the mixture out into a large bowl and set aside.

Next add the onion, garlic cloves, and beets to the food processor then blend until finely chopped. In large skillet, warm the oil over medium heat. Add the beet mixture from the food processor, sprinkle with a teaspoon of salt and cook for about 5-7 minutes, until soft. Transfer the mixture to the bowl with the chickpeas.

Add the chickpea flour to the bowl and stir together until well-combined. If the mixture appears too wet, add more flour (1 tablespoon at a time) until it’s dry enough to hold together. Scooping out about 1/4 cup of the mixture at a time, use your hands to form individual patties. Cook them in the greased skillet over medium heat for about 4 minutes on each side. Serve with tzatziki.

SPINACH AND SORRELL SQUARES

INGREDIENTS:

  • 1 lb chopped spinach sorrel blend
  • 1 cup milk
  • 2 eggs
  • 1/4 cup melted butter, oil or bacon fat
  • 1 small onion, roughly chopped
  • 1 tsp baking powder
  • 1/2 tsp salt
  • 1/2 tsp garlic powder
  • 1 tsp oregano
  • 1 cup flour
  • 1/4 cup finely chopped onion

DIRECTIONS:

Combine flour, baking powder, salt, and spices. Then add eggs, melted butter and milk. Stir thoroughly. Combine spinach, cheese, onions and peppers. Add wet mixture to spinach mix and spread in a 9 X 13 pan (greased, it sticks). Can also use an 8×8 pan for thicker squares or with less spinach. Bake at 350 for 30 min. Can broil for another 2 min to crisp the top. Let cool, cut and serve! 
 
This is one of those flexible recipes so you can modify it with more eggs, cheese or different spices, kale, etc. Freezes very well


Enjoy!